
Table of Contents
- What Pavement Cleaning Near Me Actually Involves
- What You'll Need Before You Start
- Step 1: Assess the Surface and Clear the Area
- Step 2: Pressure Washing Paving Without Damaging It
- Step 3: How to Remove Moss From Paving Properly
- Step 4: Block Paving Cleaning and Re-Sanding Joints
- Step 5: Paving Sealing After Cleaning
- Common Mistakes to Avoid
- When to Call a Professional Pavement Cleaning Service
- Conclusion
- Frequently Asked Questions
Last Updated: October 16, 2026
What Pavement Cleaning Near Me Actually Involves
Pavement cleaning is the controlled removal of dirt, algae, moss and staining from paving surfaces using the right method for that material, not simply the highest pressure available. When people search for pavement cleaning near me, they usually want one of two things: a safe DIY method or a local team who will not wreck the slabs.
At Refresh Revive Exterior Cleaning, we clean paving across Bolton and the surrounding towns, and the single biggest mistake we see is brute force. A patio or driveway is a surface with a finish, jointing and a substrate beneath it. Damage it and you are looking at replacement, not restoration.
Below, we will show you exactly how to clean paving properly, step by step, and when to stop and call in a professional.
What You'll Need Before You Start
Gather your kit before you touch the paving, because a half-finished clean is how water ends up sitting in open joints.
- A pressure washer with a rotary surface cleaner attachment, not just a lance
- A stiff broom and a soft brush
- A moss treatment or dedicated patio cleaner, applied according to the label
- Sharp sand or kiln-dried sand for re-sanding joints
- A patio sealer if you plan to seal afterwards
- Safety glasses, gloves and sturdy footwear
Check the weather first. Avoid cleaning in frost, and never wash paving that is already wet from rain, as you cannot see the dirt lifting. For context on how weather affects exterior surfaces in the North West, the Met Office climate guidance for the UK is a useful reference for planning around wet spells.
Step 1: Assess the Surface and Clear the Area
Start by identifying what you are standing on. Block paving, natural stone, concrete slabs and resin-bound surfaces each need a different approach, and some should never see a high-pressure jet at all.
Clear furniture, pots and vehicles. Sweep off loose grit and leaves. Check for cracked slabs, loose joints or wobbly blocks, because pressure will exploit any weakness already there.
Look closely at the type of growth. Green algae wipes away easily with a light wash. Black spot lichen and deep moss need a treatment-led approach rather than pressure alone. This distinction matters: treatment kills the growth, washing only removes what is visible today.
Step 2: Pressure Washing Paving Without Damaging It
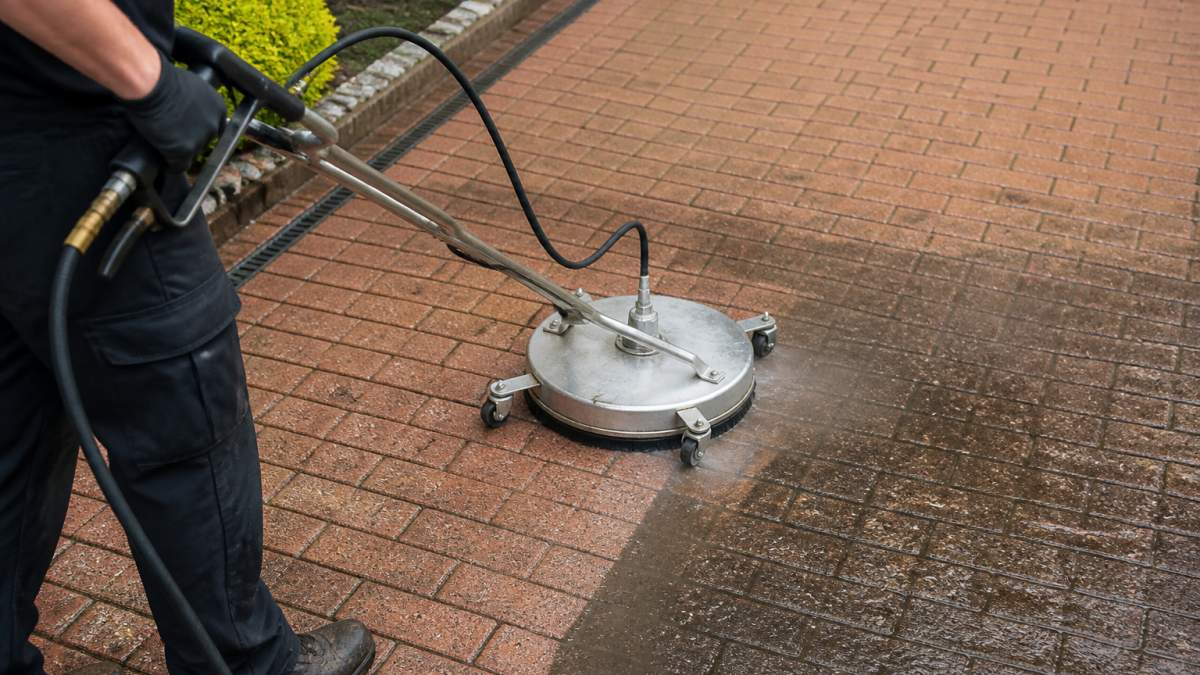
The safe way to pressure wash paving is with a rotary surface cleaner on moderate pressure, kept moving, with the nozzle matched to the surface. A bare lance held close to the slabs will strip pointing, etch the face and leave stripe marks.
Work in overlapping passes, section by section, and keep the head flat to the surface. On block paving, angle the pass so you do not blast sand out of the joints unnecessarily. Rinse as you go so dirty water does not dry back into the slabs.
For softer or older surfaces, lower pressure plus a longer dwell time from a cleaner does more good than a hard jet. That is the principle behind the Health and Safety Executive guidance on pressure system safety approach to controlled equipment use: match the tool to the job.
Step 3: How to Remove Moss From Paving Properly
To remove moss from paving properly, treat it first, let it die back, then wash out the remains. Moss holds moisture against the surface, so simply blasting the top off leaves the roots and spores behind, and it returns within weeks.
Apply a suitable moss treatment according to the label instructions and allow the recommended dwell time. Then wash the dead growth out of the joints and off the face of the paving. Pay attention to shaded edges, north-facing patios and anywhere water collects, because these are the spots moss always comes back to first.
If you want to understand why damp, shaded surfaces grow moss so readily, the Royal Horticultural Society guidance on moss and algae explains the conditions clearly. Removing the cause matters as much as removing the growth.
Step 4: Block Paving Cleaning and Re-Sanding Joints
Block paving cleaning always finishes with re-sanding. Once the joints are washed out, the blocks lose the sand that locks them together, and without it they shift, wobble and let water in.
Let the paving dry, then brush kiln-dried sand into the joints, working it in with a broom and sweeping off the excess. Do not walk on it for as long as the sand supplier advises. This step is what most DIY jobs skip, and it is why they look tired again so quickly.
For a deeper look at joint stability and paving construction, Interpave guidance on block paving is a solid technical reference.