Table of Contents
- What You'll Need Before You Start
- COSHH Driveway Cleaning Safety: What You Must Know First
- Step 1: Clear the Area and Remove Loose Debris
- How to Remove Weeds from Block Paving and Other Surfaces
- Best Driveway Cleaning Solutions for Every Surface Type
- Step 2: Apply, Scrub, and Rinse Your Driveway
- Step 3: Post-Cleaning Sealing and Maintenance to Prevent Regrowth
- Common Mistakes to Avoid When Cleaning a Driveway Without Pressure Washing
Last Updated: August 17, 2026
What You'll Need Before You Start
Manual scrubbing with the correct tools and cleaning solutions can be remarkably effective against algae, lichen, organic growth, and stubborn staining. This guide from Refresh Revive Exterior Cleaning walks you through every stage of the process, from initial debris removal through to post-cleaning sealing, so your driveway comes out looking genuinely restored rather than just damp.
Tools Checklist
Gather everything below before you begin:
- Stiff-bristled brush (long-handled outdoor broom with stiff nylon bristles for large areas)
- Smaller stiff-bristled hand brush for edges, joints, and corners
- Wire brush for stubborn lichen on concrete or stone (use with care on softer surfaces)
- Two buckets (one for solution, one for clean rinse water)
- Garden hose with an adjustable nozzle, or access to a standpipe
- Pump sprayer for even chemical application
- Stiff-bladed garden scraper or weeding tool
- Dustpan and brush or a leaf blower for dry debris removal
Protective Equipment
Driveway cleaning products are classified as hazardous substances under the Control of Substances Hazardous to Health Regulations 2002. Personal protective equipment is not optional.
- Chemical-resistant gloves (nitrile or rubber, not fabric)
- Safety goggles or a face shield
- Old clothing or a waterproof apron
- Closed-toe, non-slip footwear
- A face mask rated for vapours if working in enclosed or poorly ventilated spaces
COSHH Driveway Cleaning Safety: What You Must Know First
COSHH driveway cleaning safety protects you, your family, your neighbours, and the environment from real harm. The Control of Substances Hazardous to Health Regulations 2002 require anyone using hazardous cleaning chemicals to understand the risks before they begin.
Every cleaning product must be applied strictly in accordance with its product label and safety data sheet. Do not exceed recommended dilution rates. Do not apply products on a windy day that could carry spray onto neighbouring gardens, vehicles, or planted areas. Do not allow surface runoff to enter drains or watercourses without checking whether the product is approved for that use, as some biocidal treatments are subject to restrictions under the Health and Safety Executive biocidal products regulation guidance.
Apply cleaning agents only in dry weather. Wet surfaces dilute the product and reduce contact time, making treatment less effective and increasing runoff risk. Protect adjacent planted areas and lawns by covering them with plastic sheeting before applying any chemical treatment. Store all products in their original containers, away from children.
Step 1: Clear the Area and Remove Loose Debris
Applying a cleaning solution over leaves, grit, and loose moss is wasteful: the product binds to the debris rather than the surface. Start by removing all vehicles, bins, plant pots, and any other items from the driveway. Sweep the entire surface with a stiff-bristled brush, working from the highest point down toward the kerb or drainage channel. Use a leaf blower if you have one, particularly for getting debris out of the joints in block paving.
Once the dry sweep is done, use a stiff-bladed scraper to lift any thick deposits of moss or compacted organic growth. Bag the debris and dispose of it correctly rather than sweeping it into the road drain.
How to Remove Weeds from Block Paving and Other Surfaces
Weeds growing through the joints of block paving or cracking through concrete should be treated before any cleaning solution is applied. Use a stiff-bladed weeding tool or a pointed trowel to work along each joint and remove the root system. Simply pulling the visible growth leaves the root intact, and regrowth is rapid.
Once the physical weeds are removed, a targeted weed killer applied to the joints according to the product label will treat any remaining root material. Choose a product approved for use on hard surfaces and check that it is safe for use near drains. Allow the product to work for the time specified on the label before proceeding with cleaning.
For concrete driveways, weeds typically emerge through cracks. Remove them manually, then treat the crack with an appropriate sealant after cleaning to prevent regrowth. On tarmac surfaces, avoid any weed killer that contains solvents, as these can soften the binder in the tarmac.
| Surface | Weed removal method | Notes |
|---|---|---|
| Block paving | Manual removal + jointing weed killer | Treat joints; re-sand after cleaning |
| Concrete | Manual removal + crack sealant | Seal cracks post-cleaning |
| Tarmac | Manual removal only | Avoid solvent-based weed killers |
| Resin-bound | Manual removal, no chemicals | Chemical weed killers can discolour resin |
Best Driveway Cleaning Solutions for Every Surface Type
Choosing the wrong cleaning solution is where many DIY jobs go wrong. Surface-specific chemical compatibility matters: a product that works well on concrete can discolour block paving, and a bleach solution strong enough to clear algae from stone can soften the binder on tarmac.
Concrete Driveway
For general algae removal and organic growth, a diluted bleach solution (sodium hypochlorite at the concentration specified on the product label) applied with a pump sprayer and left to dwell for the recommended contact time is effective. Follow with manual scrubbing using a stiff-bristled brush, then rinse thoroughly.
For oil and grease stains, a dedicated degreaser formulated for porous surfaces is the correct choice. Apply, allow to dwell, scrub with a stiff-bristled brush, and rinse with hot water where possible.
Block Paving
Block paving requires a gentler approach than concrete. Many block paving units are coloured, and aggressive bleach solutions can cause fading or uneven discolouration. Choose a patio cleaner specifically labelled as safe for coloured block paving, and test it on a small, inconspicuous area first.
Apply the solution using a pump sprayer or watering can for controlled distribution. A nylon brush is preferable to a wire brush on block paving, as wire bristles can scratch the surface and dislodge jointing sand. After rinsing, check whether the jointing sand needs topping up: manual scrubbing removes some sand from the joints, and this should be replaced with kiln-dried jointing sand to prevent weed regrowth.
Tarmac and Resin-Bound Surfaces
Tarmac and resin-bound surfaces require the most careful product selection. Solvent-based cleaners and many strong chemical degreasers can dissolve the binder in tarmac or discolour resin aggregate. For tarmac, use a dedicated tarmac cleaner or a mild detergent solution and scrub gently with a stiff nylon brush. Avoid hot water, which can soften the surface.
Resin-bound surfaces are particularly sensitive. For organic growth, a diluted mildewcide or a product specifically approved for resin-bound surfaces is the safest option. Check with the surface manufacturer's guidance before applying any chemical treatment.
Step 2: Apply, Scrub, and Rinse Your Driveway
With the surface cleared and the correct cleaning solution selected, the cleaning process follows a consistent sequence: apply, dwell, scrub, rinse. Rushing any stage reduces the result.
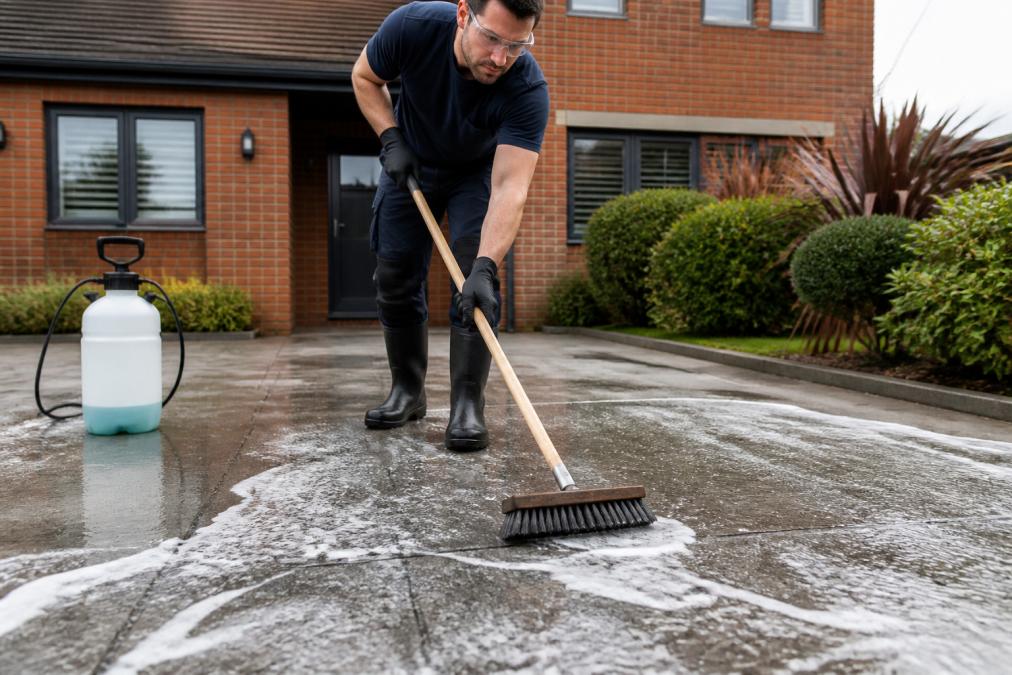
Apply your chosen solution evenly using a pump sprayer or watering can. Work in sections rather than treating the entire driveway at once, so the product does not dry out before you can scrub it. The dwell time specified on the product label is the minimum time the active ingredient needs to break down organic growth or lift staining.
Scrubbing Technique for Algae, Lichen and Organic Growth
Manual scrubbing is more effective than most people expect, provided the technique is correct. For algae and general organic growth, use a long-handled stiff-bristled brush and work in overlapping circular motions rather than straight back-and-forth strokes. This lifts growth from the pores of the surface rather than simply pushing it across.
Lichen is harder to shift than algae because it physically bonds to the surface. A wire brush used carefully on concrete or natural stone can break the bond, but avoid wire brushes on block paving or resin. For persistent lichen, a second application of biocidal treatment after the first scrub, left to dwell again before a final scrub, is often necessary.