
Block paving can look dramatically better once moss, algae, dirt and staining have been removed, but the job is not complete until the joints are properly refilled. Knowing how to re-sand block paving helps keep the blocks supported, reduces movement and restores the neat, finished appearance of a driveway, path or patio.
The short answer is to wait until the paving is fully dry, brush suitable kiln-dried jointing sand across the surface, work it thoroughly into every joint and repeat until the joints will accept no more. The detail matters, though. Sanding damp paving, using the wrong material or leaving joints partly empty can undermine the benefit of cleaning.
Why block paving needs jointing sand
Individual block pavers are not usually fixed together with mortar. Their strength comes from a properly prepared base, edge restraints and sand-filled joints that help the blocks interlock. Rain, foot traffic, vehicle use, weeds, moss and pressure washing can all reduce the amount of sand in those joints over time.
When joints are low or empty, blocks can be more prone to rocking or shifting. Gaps also provide space for wind-blown debris and weed seeds to settle. Re-sanding is therefore not simply a cosmetic finishing touch. It is a key part of routine block-paving maintenance after a deep clean.
That said, new sand will not correct every issue. If blocks have sunk, edges are spreading, drainage is poor or the base has failed, the paving may need repair before it is cleaned and re-sanded. Filling a wide structural gap with sand alone is unlikely to provide a lasting answer.
How to re-sand block paving properly
Start only when the surface and joints are dry. This is the point most often rushed after cleaning. Damp sand clumps, sticks to the face of the blocks and does not travel freely to the bottom of the joints. A dry, settled surface allows the sand to brush in evenly.
Use clean kiln-dried paving sand intended for block-paving joints. It is fine-grained and dry enough to work down into narrow gaps. Building sand, sharp sand and sand collected from another part of the garden are poor substitutes: they may be too damp, too coarse or contain soil and contaminants that encourage weed growth.
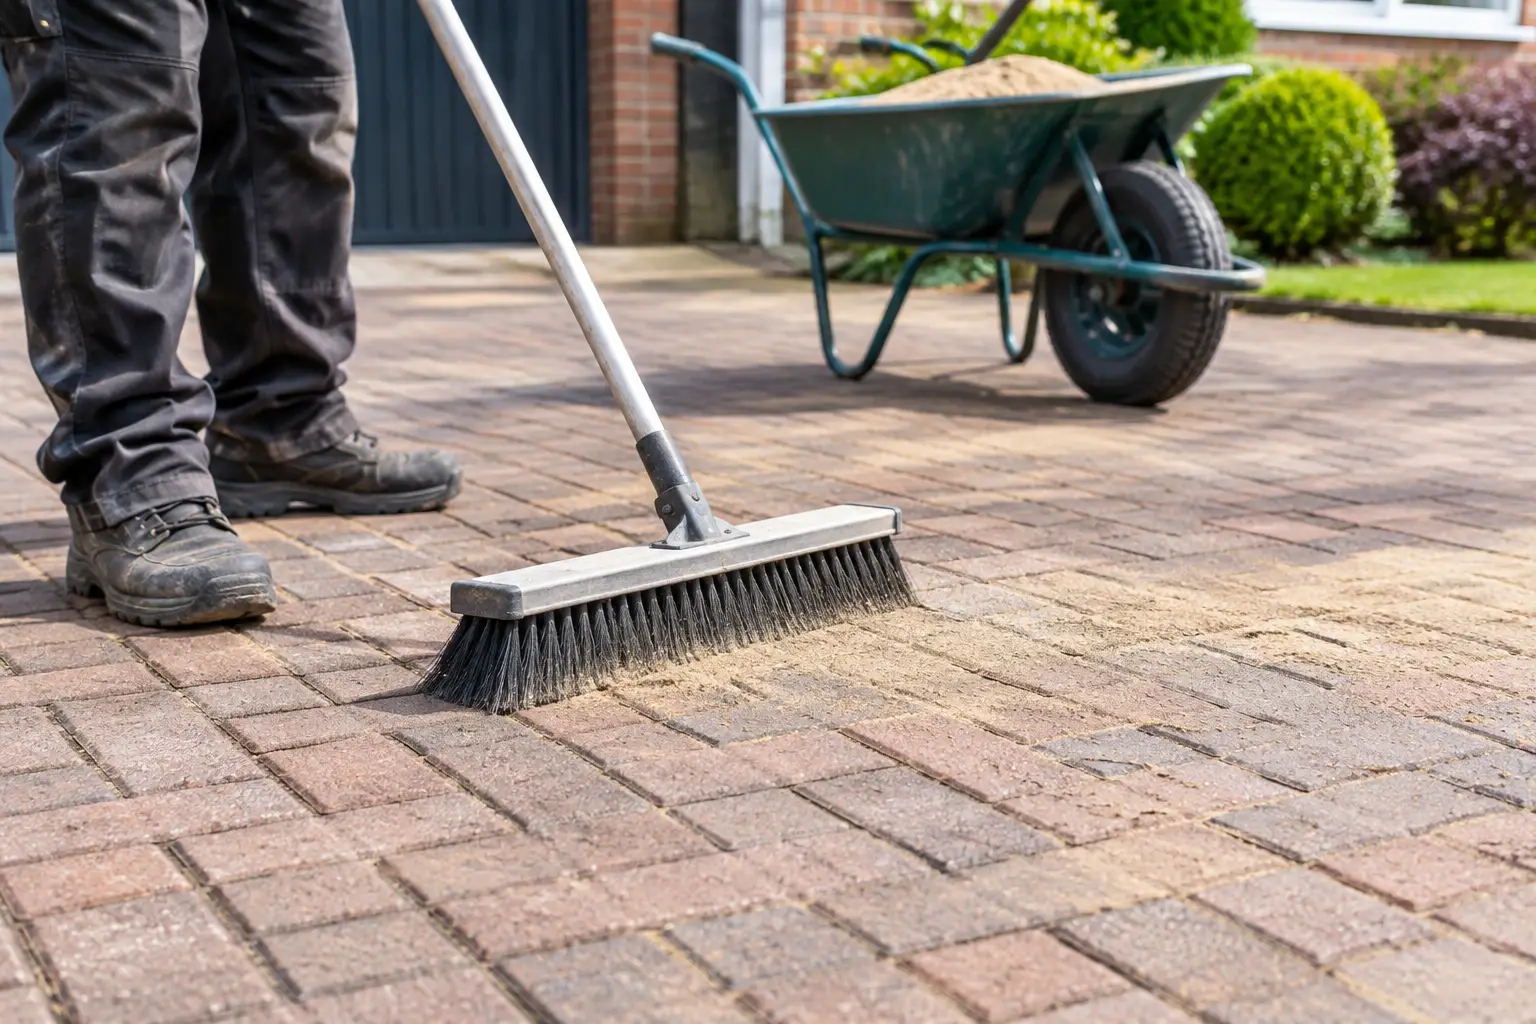
Spread a modest amount of sand over the paving rather than tipping a large heap in one place. Use a stiff brush to move it diagonally across the joints. Brushing diagonally is helpful because it encourages the sand into gaps without repeatedly following the joint lines and dragging material back out.
Work across the whole paved area methodically. Pay particular attention to the outer edges, around drainage channels and any places where cleaning has exposed deeper joints. The aim is not to leave a layer of sand sitting on top of the blocks. It is to fill the joints from the bottom upwards.
Once the first pass is complete, sweep away the excess and inspect the joints. Some areas will settle as the sand finds its way further down. Add more sand and repeat the process until the joints are consistently full, usually stopping just below the top edge of the blocks rather than mounding sand over them.
For a driveway, gentle use after sanding can help the material settle further. Check the joints again after a period of normal use and after rainfall, then top up where required. This is especially worthwhile on vehicle tracks and at turning points, where jointing sand can wear more quickly.
A simple preparation check
Before opening a bag of sand, make sure you have a dry forecast, a stiff outdoor brush, suitable kiln-dried jointing sand, gloves and a clean surface. If the paving has just been washed, allow enough drying time for the joints as well as the block faces. Shaded areas and north-facing sections can remain damp longer than the rest of the driveway.
Avoid using a pressure washer after the final sanding pass. High pressure can lift fresh sand straight back out of the joints. If a further clean is needed, it is usually better to deal with that before re-sanding or seek advice on the appropriate method for the surface and its condition.
Choosing the right sand for a driveway or patio
For conventional concrete block paving, kiln-dried jointing sand is the usual choice. Buy a product clearly described for block-paving joints and follow the manufacturer's instructions, particularly where it specifies suitability, coverage or application conditions.
Some homeowners consider polymeric jointing sand, which contains binders designed to firm up when activated in the correct way. It can suit certain paving systems, but it is not automatically the best option for every driveway or patio. The paving type, joint width, drainage arrangement, existing condition and installation guidance all matter. Applying it incorrectly, or using it on an unsuitable surface, can leave residue on the blocks or cause problems with drainage and joint performance.
Natural stone setts, clay pavers and slabs may need a different approach from standard concrete blocks. Their joint widths and surface finishes vary, and some materials can be more sensitive to cleaning methods or staining. If you are unsure what your paving is made from, avoid guessing with a jointing product solely because it is marketed as all-purpose.
Common mistakes that leave paving looking unfinished
The most common mistake is sanding too soon. A driveway can look dry from a doorway while moisture remains deep in the joints. If the sand will not brush in freely, stop and let the surface dry further.