27 August 2026 · Last updated 30 August 2026 · Refresh Revive Exterior Cleaning — 10 years of industry experience and £5 million insurance cover.
Clean render without damage: Learn how to clean render safely without causing surface erosion or damage. Step-by-step guide covering methods, equipment.
Why Render Gets Dirty: Understanding Algae, Moss, and Pollution
Render accumulates dirt for reasons beyond simple neglect. The porous nature of render, whether silicone render, lime render, or acrylic, makes it a magnet for organic staining, algae growth, and moss. These aren't cosmetic problems alone; they indicate moisture retention and biological colonisation that can accelerate surface deterioration if left unchecked.
Algae thrives in damp conditions, particularly on north-facing walls where sunlight is limited and moisture lingers. Moss grows deeper, sending roots into the render's substrate and causing structural damage over time. Atmospheric pollution, soot, diesel particulates, and industrial residue, bonds to the surface, creating dark streaks that age a property visually by years.
Understanding what causes these deposits is the first step toward choosing a cleaning method that removes them without compromising the render itself.
The porosity of render is both its weakness and the reason why aggressive cleaning fails. High-pressure water forces itself into the substrate, separating the render from its base and causing delamination, a problem far worse than the original staining. This is where most DIY attempts go wrong.
Key TakeawayRender gets dirty through three mechanisms: organic growth (algae and moss), atmospheric pollution, and moisture retention. Each requires a different removal approach, and each can be worsened by the wrong cleaning method.
Soft Washing Render vs Pressure Washing: Which Method Protects Your Surface
Pressure washing uses high-velocity water, typically 3,000 PSI or higher, to blast away dirt. On render, this approach is destructive. The force drives water into the porous substrate, separates the render from its backing, strips away the protective surface layer, and can create hairline fractures that invite moisture ingress. Once water penetrates behind the render, frost damage becomes inevitable during winter months, leading to spalling and crumbling.
Soft washing render employs low-pressure application, usually under 500 PSI, combined with pH-neutral cleaning solutions. The detergent does the work; the water merely rinses. This method dissolves organic staining and algae without forcing moisture into the substrate. The render remains intact, and the surface retains its protective qualities.
The difference in outcomes is dramatic. A pressure-washed render wall may look clean for weeks, but within months, you'll notice new damage: surface erosion, colour fading, and accelerated deterioration. A soft-washed render wall maintains its integrity and appearance for significantly longer.
Soft washing is particularly effective for lime render, which is softer and more absorbent than modern acrylic or silicone render. Pressure washing lime render is almost guaranteed to cause visible damage. Even on harder render types, the risks outweigh any speed advantage.
Watch OutPressure washing render above 1,500 PSI causes irreversible damage: substrate separation, surface erosion, and moisture ingress leading to frost damage and spalling. This damage often takes months to become visible, by which time remedial work is expensive.
Render Cleaning Safety Precautions: PPE and Essential Precautions
Cleaning render safely requires more than good intentions. The chemicals involved, the height of most render walls, and the potential for water ingress demand systematic precautions.
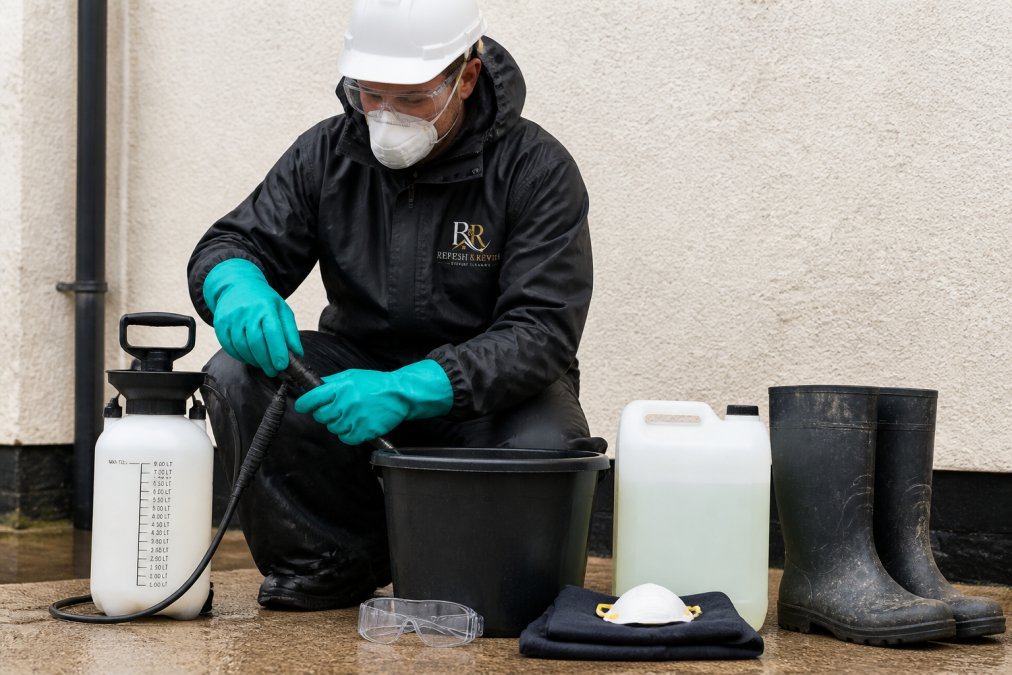
Personal Protective Equipment (PPE) is non-negotiable. Safety goggles protect your eyes from splashes and aerosol mist. Chemical-resistant gloves prevent skin contact with cleaning solutions. Protective clothing, long sleeves and trousers, shields your skin. For overhead work, a hard hat protects against falling debris. Respiratory protection may be necessary if you're working in enclosed spaces or with products that produce fumes; check the product label and safety data sheet.
COSHH (Control of Substances Hazardous to Health) compliance is a legal requirement in the UK. Before applying any chemical treatment, you must:
Read the product label and safety data sheet
Understand the hazards
Follow dilution ratios precisely
Use appropriate PPE as specified
Ensure adequate ventilation
Have a plan for accidental spillage or skin contact
Never mix cleaning chemicals. Combining products, even seemingly harmless ones, can produce toxic gases or corrosive reactions. If you've used one product and want to switch, rinse thoroughly and allow the surface to dry completely before applying anything else.
Environmental precautions protect your garden and surroundings. Cover plants, close windows, and shield air conditioning units before you begin. Rinse away all cleaning solution residue; allow it to run into drains, not onto soil or planting. The runoff from render cleaning can harm vegetation if it contains biocide or fungicide.
Working at height requires fall prevention. Use stable ladders, never overreach, and consider a safety harness if you're working on a roof or high wall. Falls are among the most common causes of serious injury during DIY exterior work.
Worker wearing full PPE including safety goggles, chemical-resistant gloves, protective clothing, and hard hat while preparing cleaning equipment and supplies on ground level
Pro TipBefore starting any cleaning project, conduct a site survey: identify electrical hazards, check for asbestos (in older properties), note the render type, and plan your access route. Ten minutes of planning prevents hours of complications.
Step-by-Step: How to Clean Render Without Damage
Cleaning render without damage follows a structured process. Skipping steps or rushing through preparation is where most DIY attempts fail.
Step 1: Prepare the Area and Protect Surroundings
Begin by clearing the area directly below and around the render wall. Move potted plants, garden furniture, and anything that could be damaged by water runoff. Cover soil beds and lawn areas with plastic sheeting if you're using chemical treatments; this prevents biocide or fungicide from harming vegetation.
Close windows and doors on the wall you're cleaning. Tape over air conditioning vents and external electrical outlets. If the wall borders a neighbour's property, inform them of your plans, water and chemical spray can drift.
Inspect the render for cracks, gaps, or areas where water might penetrate behind the surface. If you spot significant damage, consider professional assessment before proceeding. Cleaning can sometimes reveal problems that weren't visible under dirt.
Step 2: Choose Your Cleaning Method
For algae and organic staining, soft washing with a pH-neutral detergent is the safest approach. For atmospheric pollution and stubborn deposits, you may need a slightly stronger solution, but always stay within the product's recommended dilution ratio.
Test your chosen method on an inconspicuous area first, a section of render on the back of the house or a garage wall. Apply the treatment, allow it to work, rinse, and observe the result over several days. This test confirms the method works without causing damage before you commit to the entire wall.
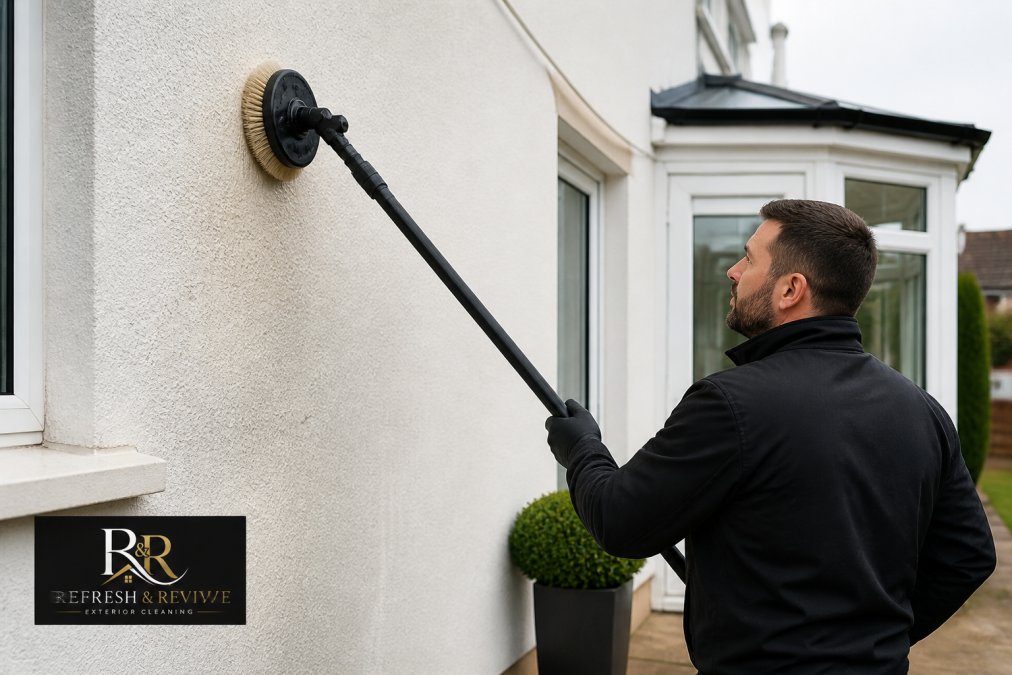
Select equipment appropriate to soft washing: a low-pressure fan nozzle (not a jet nozzle) and a pump-up sprayer or garden hose with a soft-wash attachment. Avoid high-pressure washers entirely for render cleaning.
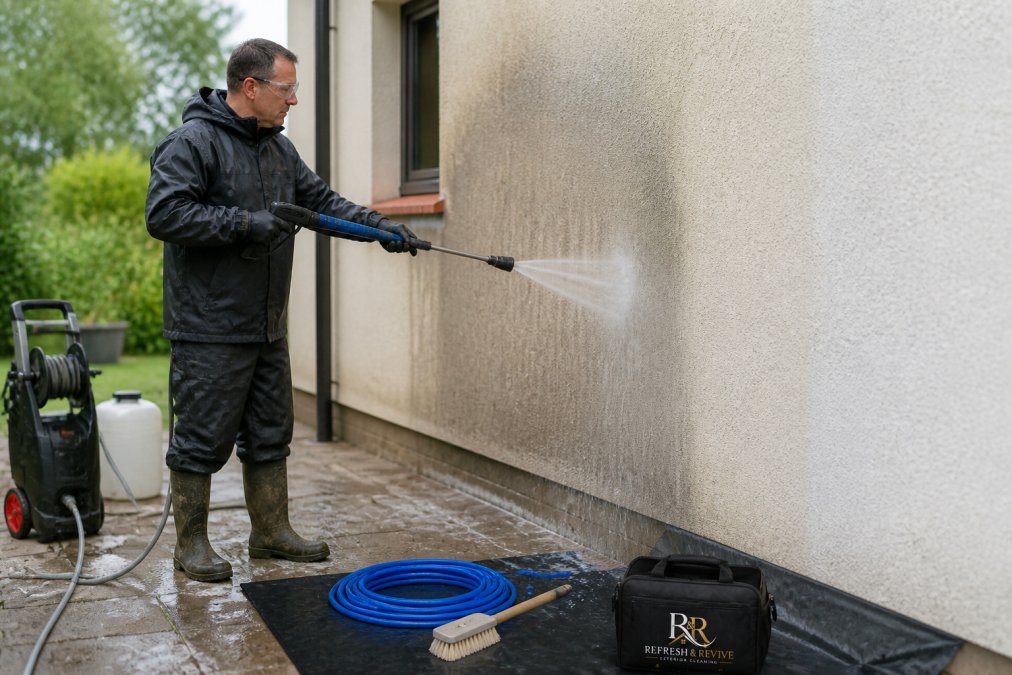
Professional technician using a low-pressure fan nozzle on rendered wall surface from safe distance, demonstrating proper technique with water misting gently across the substrate
Step 3: Apply Treatment and Allow Dwell Time
Apply your chosen cleaning solution evenly across the render surface using a low-pressure sprayer. Work from bottom to top to avoid streaking. The solution should coat the surface thoroughly but not run off immediately.
Dwell time, the period the solution sits on the surface, is critical. Most pH-neutral cleaners and biocides require 15 to 30 minutes to break down algae and organic matter (peer-reviewed research). Check the product label for the exact dwell time. During this period, do not allow the surface to dry out; if necessary, mist it lightly to maintain moisture.
For heavy algae or moss, you may need to apply a second coat or extend dwell time. Patience here eliminates the temptation to use higher pressure to speed the process.
Step 4: Rinse Carefully With Low Pressure
Once dwell time is complete, rinse the surface thoroughly with low-pressure water. Use a fan nozzle, not a jet. Keep the nozzle moving to avoid concentrating water on any single area. Rinse from top to bottom, allowing water to flow downward naturally.
Pay particular attention to crevices, joints, and areas where solution may have pooled. Incomplete rinsing leaves residue that can attract dirt faster and may cause discolouration over time.
Allow the render to dry naturally. Do not use heat or compressed air to accelerate drying; this can trap moisture within the substrate.
How to Remove Black Mould From Render Walls
Black mould on render is not simply a cosmetic issue; it indicates moisture problems and can accelerate substrate deterioration. Mould growth signals that the render is retaining water, a condition that worsens over time if left untreated.
Black mould is typically a fungal growth, not algae (the CDC). It thrives in persistently damp conditions, particularly on shaded walls or areas with poor drainage. Removing it requires a fungicide, not just a detergent.
Apply a fungicide solution according to the product label and safety data sheet. Allow adequate dwell time, usually 20 to 30 minutes. Fungicides work by breaking down the mould's cellular structure; rushing the rinse cycle reduces effectiveness.
After rinsing, monitor the area for regrowth. If mould returns within weeks, the underlying moisture problem must be addressed. This might involve improving drainage around the wall base, clearing gutters and downpipes, or ensuring that soil slopes away from the foundation. Without fixing the moisture source, cleaning alone provides only temporary relief.
Watch OutBlack mould indicates persistent moisture retention. Cleaning removes the visible growth but does not solve the underlying problem. If mould returns rapidly after treatment, consult a surveyor or drainage specialist to identify and fix the moisture source.
Long-Term Maintenance: Preventing Regrowth and Surface Deterioration
The best render cleaning is the one you don't have to repeat. A structured maintenance schedule prevents algae and moss from establishing deep colonies and keeps your render looking fresh.
Establish a twice-yearly inspection routine: once in spring after winter weather and once in autumn before the wet season begins. Look for early signs of algae, a slight green or brown tint, and moss patches. Catching these early means a simple soft wash prevents heavy infestation.
Clear gutters and downpipes every quarter. Blocked drainage forces water to run down the render surface, creating ideal conditions for organic growth. A few minutes of gutter maintenance prevents weeks of render problems.
Ensure soil and landscaping slope away from the wall base. Water that pools against the foundation wicks upward into the render, creating persistent dampness. Grade adjustment or French drainage can solve chronic moisture issues.
Consider applying a protective coating after cleaning. Modern protective coatings, applied by professionals, create a water-repellent barrier that slows algae colonisation and makes future cleaning easier. These coatings do not prevent growth entirely but significantly extend the interval between cleanings.
Document your maintenance schedule. Record cleaning dates, methods used, and any observations about regrowth or damage. This record helps you identify patterns and adjust your approach if needed.
DIY vs Professional Cleaning: When to Call a Specialist
DIY render cleaning works for small, accessible walls with light to moderate soiling. If your render is on a single-storey section, easily reached from ground level, and shows only surface algae or light weathering, a careful DIY approach is feasible.
Professional cleaning becomes the practical choice in several scenarios. If your render is on a multi-storey property, working safely at height requires scaffolding and trained operatives. If the soiling is heavy or includes stubborn atmospheric pollution, professional-grade equipment and expertise deliver better results without risk of damage. If you're uncertain about the render type or the appropriate cleaning method, a specialist assessment prevents costly mistakes.
Refresh Revive Exterior Cleaning applies the White Glove Standard™, a meticulous, surface-specific approach that assesses your render type, identifies the cause of soiling, and selects the safest cleaning method. Our fully insured team protects your property, planting, and lawns throughout the process. We offer no-obligation quotations and can arrange a maintenance visit after cleaning to prevent regrowth.
The cost difference between DIY and professional cleaning often reflects the difference between a temporary fix and a lasting result. Professional work includes proper assessment, appropriate equipment, and follow-up maintenance, all of which extend the life of your render and protect your property investment.
Render cleaning without damage is entirely achievable when you understand what causes soiling, why pressure washing fails, and how soft washing protects your surface. The methods covered here, low-pressure application, pH-neutral solutions, adequate dwell time, and careful rinsing, are the foundation of safe, effective cleaning.
If your render requires professional attention or you'd like expert advice on the best approach for your property, Refresh Revive Exterior Cleaning is here to help. Our team has the experience, equipment, and fully insured credentials to restore your render safely. Request a free quote today and discover how our White Glove Standard™ approach protects your property while delivering brilliant results.
=== FAQ ANSWERS (audit these too, same rules) ===
[1] Q: Can you clean render with washing up liquid?
A: Washing up liquid is not recommended for render cleaning. Use only mild detergents specifically formulated for exterior surfaces, applied according to the product label and safety data sheet. Always follow COSHH control guidance. Household products may leave residue, damage the substrate, or react unpredictably with render types like silicone or lime render. Professional-grade cleaners are pH-neutral and designed to prevent surface erosion.
[2] Q: Is pressure washing safe for rendered walls?
A: High-pressure washing damages render by causing surface erosion, stripping protective coatings, and forcing water into porous substrates. Low-pressure methods using a fan nozzle are safer. Soft washing with biocide or fungicide treatments is the preferred approach for algae and organic staining. Always keep pressure below 80 bar and maintain distance. If you're unsure, professional soft washing is the safer choice to protect your render.
[3] Q: How long does render cleaning last before moss and algae return?
A: Results depend on your local climate, atmospheric pollution levels, and render type. Without preventative measures, organic growth can return within weeks to months. A long-term maintenance schedule with regular inspection and early treatment prevents regrowth. Applying a protective coating after cleaning can extend results. Professional maintenance visits catch early signs of algae or moss before they establish, keeping your render clean longer than DIY one-off cleaning.
[4] Q: What's the difference between silicone render and lime render when cleaning?
A: Silicone render is more durable and water-resistant but can be damaged by abrasive methods. Lime render is more porous and breathable but requires gentler treatment to avoid erosion and efflorescence. Both benefit from low-pressure soft washing with appropriate biocide for organic staining. Always check your render type before choosing a cleaning method, as pressure, detergent concentration, and dwell time must be adjusted accordingly to avoid substrate damage.
Frequently Asked Questions
Q: Can you clean render with washing up liquid?
A: Washing up liquid is not recommended for render cleaning. Use only mild detergents specifically formulated for exterior surfaces, applied according to the product label and safety data sheet. Always follow COSHH control guidance. Household products may leave residue, damage the substrate, or react unpredictably with render types like silicone or lime render. Professional-grade cleaners are pH-neutral and designed to prevent surface erosion.
Q: Is pressure washing safe for rendered walls?
A: High-pressure washing damages render by causing surface erosion, stripping protective coatings, and forcing water into porous substrates. Low-pressure methods using a fan nozzle are safer. Soft washing with biocide or fungicide treatments is the preferred approach for algae and organic staining. Always keep pressure below 80 bar and maintain distance. If you're unsure, professional soft washing is the safer choice to protect your render.
Q: How long does render cleaning last before moss and algae return?
A: Results depend on your local climate, atmospheric pollution levels, and render type. Without preventative measures, organic growth can return within weeks to months. A long-term maintenance schedule with regular inspection and early treatment prevents regrowth. Applying a protective coating after cleaning can extend results. Professional maintenance visits catch early signs of algae or moss before they establish, keeping your render clean longer than DIY one-off cleaning.
Q: What's the difference between silicone render and lime render when cleaning?
A: Silicone render is more durable and water-resistant but can be damaged by abrasive methods. Lime render is more porous and breathable but requires gentler treatment to avoid erosion and efflorescence. Both benefit from low-pressure soft washing with appropriate biocide for organic staining. Always check your render type before choosing a cleaning method, as pressure, detergent concentration, and dwell time must be adjusted accordingly to avoid substrate damage.
Looking for exterior cleaning firms in Cheshire with ongoing maintenance contracts to stop render algae returning? Here's how planned render care works.